The Triumph PET/CT scanner provides the capability to scan one or more small subjects while providing co-registered CT images for anatomical reference. This section describes an analysis stream for co-registering whole-brain images to standardized neuroanatomical spaces.
Analysis proceeds from study data as it is originally saved on the scanner. Scripts expect data from CT and PET to be separated into different directories. The name of the CT and PET directories are initially defined by an initialization file on the first invocation of the script, and then they can be changed. All session-specific and subject-specific data are stored on local files and retrieved by the scripts. A typical CT directory (default name: ct) will contain a series of 224 DICOM images (1 for each slice). A typical PET directory (name like "output.job2.BQML.i16”) will contain a series of DICOM files separated into slices and time points. Suppose that these 2 subdirectories on stored a directory named “fdg-study1”. Go there and invoke the analysis script, which is assumed to be an alias named “mpet” below. Output is shown below.
linux> cd fdg-study1
linux> mpet
-----------------------
settings for group
-----------------------
1) CT Input Directory : ct
2) CT 1st file name : CTImage_0001.dcm
3) PET Input Directory : output.job2.BQML.i16
4) PET 1st file name : S_00001
5) Species : mouse
6) counts/sec to Bq/ml : 93.0843
7) Image range for SUV : 25-n
8) Spatial smoothing : 0
-----------------------
actions on group
-----------------------
c) convert group CT
p) convert group PET
Input selection [h = help, q = quit, s = subject] >
Pre-process data for the group using the steps described in the sidebar. Then option “s” switches to subject-specific analysis and shows this. The image range takes the default value from the group but can be changed. Injected activity and body weight need to be entered and then will be stored.
settings for subject 1
-----------------------------
1) Subject identifier : 1
2) Activity (uCi) : -1
3) Weight (g) : -1
4) Image Range for SUV : 25-n
---------------------------
actions on subject 1
---------------------------
a) align subject
Input selection [h = help, q = quit, q = quit to return to group] >
The selection “a” will bring up an alignment tool that looks like this. Place the crosshair on the brain of the selected subject and choose reset/shift FOV.
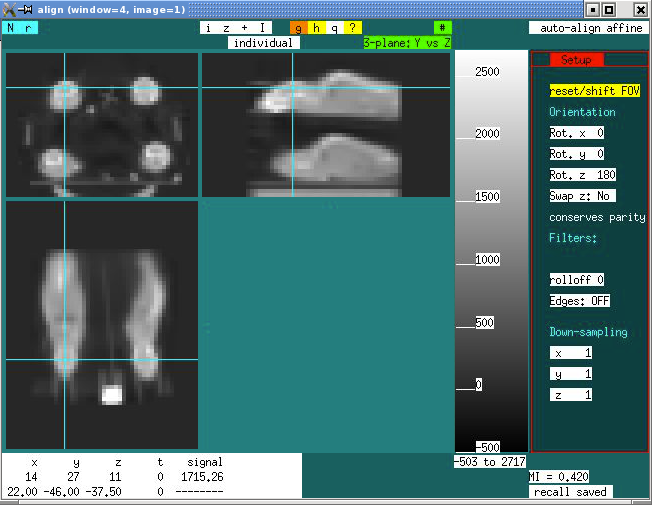
The action “reset/shift FOV” will result in a small and shifted FOV that looks like this:
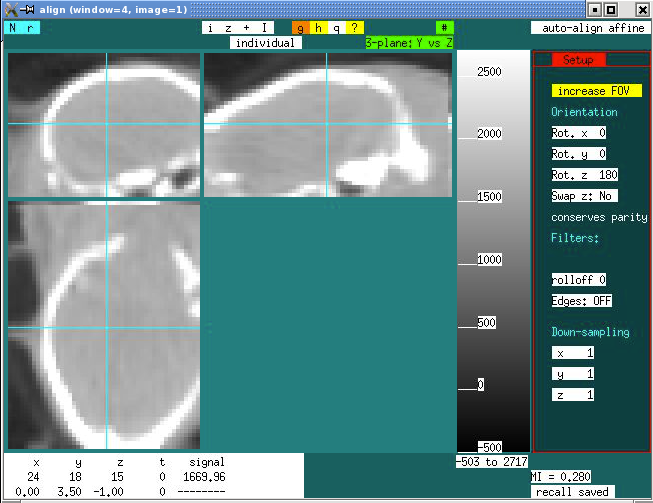
Depending upon how far the brain is out of the FOV, you may need to manually adjust the first 6 affine parameters to get a better starting point, and then type “a” to auto-align. Then type “q” to quit and answer “y” when it asks if you really want to quit.
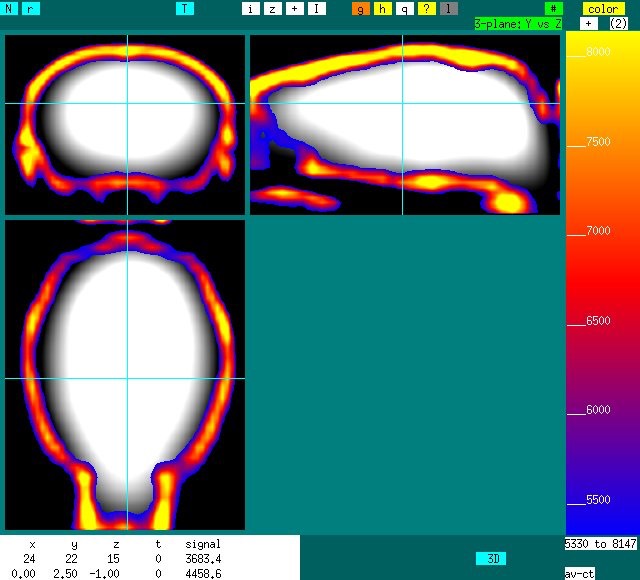
Registered PET & CT data will look like this if you choose the selection to view the aligned data.